Introduction
Building a game in Unity is only half the journey; exporting it correctly for different platforms is what truly defines its success ( export unity game ).
This article on how to build and export a Unity game for PC, Android, and WebGL walks you through the best practices, build settings, and performance tips needed to publish your game across multiple platforms.

By the end of this guide, you’ll understand how to optimize your Unity project, avoid common export errors, and deliver a polished gaming experience on desktop, mobile, and web.
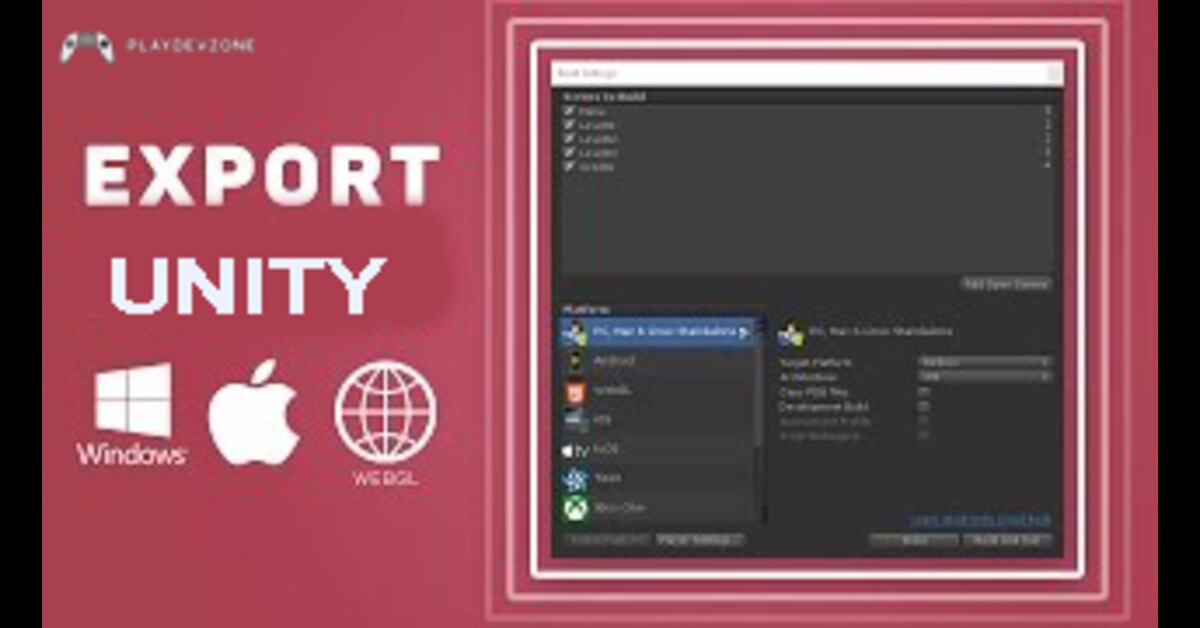
Understanding Unity’s Build System
Understanding Unity’s Build System is a crucial step in transforming your game from a development project into a playable experience.
Unity’s build system enables you to compile your game for multiple platforms, including PC, Android, and WebGL, using a single codebase.
By learning how to build settings, scenes, and player configurations that work together effectively, developers can avoid common errors and improve performance across various devices ( export unity game ).
Mastering this system not only saves time but also empowers you to confidently publish your Unity game and reach players anywhere in the world.
Prerequisites Before Building Your Unity Game
Before building your Unity game, it’s important to set up the right foundation to avoid errors and save valuable development time.
Start by installing the latest stable version of Unity through Unity Hub and ensure the required build modules PC, Android, or WebGL are included.
Your project should have properly configured scenes, optimized assets, and correct player settings for the target platform.
Checking system requirements, testing gameplay functionality, and organizing files in advance will make the build process smoother.
Preparing these prerequisites empowers you to export your Unity game confidently and focus on delivering a polished experience.
Preparing Your Unity Project for Export
Preparing your Unity project for export is a vital step to ensure your game runs smoothly on any platform.
Before building, confirm that all required scenes are added to the Build Settings and unnecessary assets are removed to reduce file size.
Adjust Player Settings such as resolution, orientation, quality, and input options based on your target platform.
Optimizing textures, audio, and scripts helps improve performance and prevents build-time errors.
A well-prepared Unity project not only speeds up the export process but also increases stability, giving your game the professional polish it deserves before release.
How to Build and Export Unity Game for PC (Windows / macOS / Linux)
Building and exporting a Unity game for PC is one of the most rewarding steps in game development.
Unity makes it easy to deploy your project to Windows, macOS, or Linux from a single workspace.
By selecting the appropriate platform in Build Settings and configuring resolution, graphics quality, and input controls, you can create a smooth desktop experience.
Exporting your game generates a standalone executable that players can run instantly ( export unity game ).
With proper testing and optimization, your Unity PC build can deliver stable performance and bring your game to life on desktop platforms worldwide.
How to Build and Export Unity Game for Android
Exporting your Unity game for Android is a powerful way to bring your creation to millions of mobile players.
Start by installing Android Build Support in Unity Hub, then configure your Player Settings for mobile performance, screen orientation, and touch controls.
Choose between APK or AAB depending on your publishing needs, and make sure to set the correct package name and keystore for signing ( export unity game ).
Once the build is ready, you can test it directly on an Android device to ensure smooth gameplay and responsive controls.
With the right settings, your Unity game can deliver a polished mobile experience and reach a global audience.
How to Build and Export Unity Game for WebGL
Exporting your Unity game for Android is a powerful way to bring your creation to millions of mobile players.
Start by installing Android Build Support in Unity Hub, then configure your Player Settings for mobile performance, screen orientation, and touch controls.
Choose between APK or AAB depending on your publishing needs, and make sure to set the correct package name and keystore for signing.
Once the build is ready, you can test it directly on an Android device to ensure smooth gameplay and responsive controls ( export unity game ).
With the right settings, your Unity game can deliver a polished mobile experience and reach a global audience.
Common Build Errors and How to Fix Them
Even experienced Unity developers face build errors, but the good news is that most of them are easy to fix once you know the cause.
Common issues include missing scenes in Build Settings, incompatible plugins, incorrect platform modules, or outdated SDK tools.
Performance-related errors may also appear when asset sizes are too large or when scripts are not optimized.
To solve these problems, check your console for error messages, ensure all required modules are installed, and verify your player settings for the target platform ( export unity game ).
With a systematic approach, you can quickly identify the issue, fix it, and continue building your game confidently.
Every error is a step closer to a polished release.
Testing Your Unity Game Before Release
Testing your Unity game before release is essential to deliver a polished and enjoyable experience.
It’s the step where you identify bugs, optimize performance, and ensure your game feels smooth on all target platforms.
Start with functional testing to verify gameplay mechanics, controls, and UI behavior.
Next, run performance tests on PC, Android, or WebGL to check frame rates, loading times, and memory usage ( export unity game ).
Use real devices and browsers to confirm compatibility, and gather feedback from friends or beta testers.
Thorough testing not only improves game quality but also builds player trust and increases your chances of success when publishing your Unity game.
Publishing Your Unity Game
Publishing your Unity game is the final and most rewarding step in your development journey.
After building and testing your project across platforms, it’s time to share your creation with the world.
Whether you choose to publish on Steam, itch.io, Google Play Store, or a web hosting platform, the key is to ensure your game is optimized, signed, and packaged correctly for your target audience ( export unity game ).
Proper marketing, a clear game description, and eye-catching visuals can help your game stand out.
When you publish your Unity game, you’re not just releasing a product; you’re sharing your creativity, skills, and passion with players everywhere.
FAQ (Frequently Asked Questions)
How to export Unity game as WebGL?
Exporting your Unity game as WebGL is a great way to make it playable directly in web browsers.
First, open Build Settings and switch the platform to WebGL, then click Switch Platform.
Next, optimize your project by reducing asset sizes and simplifying shaders to improve load times.
Adjust Player Settings for WebGL performance and memory usage, then click Build and choose a folder destination ( export unity game ).
Once the build is complete, you can host the WebGL files on websites or platforms like itch.io.
This lets players access your game instantly, no downloads required, making it easier to share and showcase your work.
How to export Unity game to Android?
Exporting your Unity game to Android is an exciting step toward reaching millions of mobile players.
First, install Android Build Support in Unity Hub, including the SDK/NDK and OpenJDK tools ( export unity game ).
Open Build Settings, switch the platform to Android, and configure Player Settings like screen orientation, resolution, and package name.
Choose APK or AAB depending on your publishing plan, then click Build.
After the build finishes, test your game on a real Android device to ensure smooth performance and responsive touch controls.
With the right setup, your Unity game can deliver a polished mobile experience and be ready for the Google Play Store.
How do I build for WebGL in Unity?
To build for WebGL in Unity, start by opening File → Build Settings, then select WebGL and click Switch Platform.
Next, ensure your project is optimized for the web by reducing asset sizes, simplifying shaders, and minimizing memory usage.
Configure WebGL-specific Player Settings like resolution, compression format, and WebGL template to improve loading times.
Once ready, click Build, choose a destination folder, and Unity will generate the WebGL build files ( export unity game ).
You can then host these files on a website or platforms like itch.io, allowing players to run your game instantly in their browser without downloading anything.
Is 32 GB RAM enough for Unity?
Yes, 32 GB of RAM is more than enough for most Unity projects, especially for indie games and small-to-medium-sized teams.
It provides smooth performance when working with large scenes, high-resolution textures, and multiple open assets ( export unity game ).
While Unity can run on 8–16 GB for basic projects, 32 GB reduces lag, speeds up build times, and improves stability during intense tasks like baking lighting or compiling large scripts.
If you’re planning on working with massive open worlds, advanced simulations, or heavy multitasking, 32 GB is a strong, future-proof choice that helps you focus on creativity instead of performance limits.
Is 4GB RAM enough for Unity?
While Unity can technically run on 4GB RAM, it’s usually not enough for smooth development.
With limited memory, you may experience slow loading, frequent crashes, and long build times, especially when working with modern assets, large scenes, or complex scripts.
For beginners creating simple 2D projects, 4GB may be manageable, but it will quickly become restrictive as your game grows.
If you want a smoother experience and faster productivity, upgrading to 8GB or 16GB is highly recommended ( export unity game ).
More RAM helps Unity run efficiently, allowing you to focus on creativity rather than technical limitations.
Conclusion
Building and exporting your Unity game for PC, Android, and WebGL is the final, most exciting step in your development journey.
By mastering the build system, preparing your project properly, and following platform-specific settings, you can deliver a smooth, polished experience on any device.
Whether you’re targeting desktop players, mobile users, or browser-based audiences, Unity makes multi-platform publishing achievable with the right preparation and testing.
Now that you know the process, it’s time to take your project from the editor to the world.
Export your game, share it with players, and let your creativity reach new heights.
The best part? This is only the beginning of your game development adventure.