Introduction
Are you ready to bring your game ideas to life, but don’t know where to start?
Unity is one of the most potent and beginner-friendly game engines in the world, and this guide will walk you through every step of getting started (The Project Unity).
In this Beginner’s Complete Setup Guide, you’ll learn how to start a project in Unity from scratch, install the right tools, set up your first scene, and build a solid foundation for your game development journey.
Whether you dream of creating 2D platformers, 3D worlds, or VR experiences, this tutorial will help you start strong, avoid beginner mistakes, and understand precisely how Unity works, even if you’ve never coded.
Let’s dive in and turn your creativity into your first playable project!
What is Unity and Why Should You Use It?
If you’ve ever dreamed of creating your own video game or interactive 3D world, Unity is where it all begins.
Unity is a powerful and beginner-friendly game engine that allows you to design stunning 2D, 3D, AR, and VR experiences all without needing a massive budget or studio.
It’s trusted by millions of developers worldwide for its flexibility, free tools, and tremendous community support (The Project Unity).
In this guide, you’ll discover what makes Unity the go-to platform for aspiring creators and why learning it today could be your first step toward a professional game development career.
System Requirements & Tools You’ll Need
Before building your first game in Unity, you must know the system requirements and tools for a smooth experience.
Unity runs best on a computer with at least 8GB of RAM, a modern multi-core processor, and a dedicated graphics card for rendering 3D visuals.
You’ll also need to install Unity Hub, the Unity Editor, and Visual Studio for scripting.
Setting up these essential tools on Windows or macOS ensures your projects run efficiently (The Project Unity).
With the proper setup, you can focus entirely on creativity, designing, coding, and bringing your dream game to life!
Download and Install Unity Hub
To begin your game development journey, the first step is to download and install Unity Hub, the official launcher that manages all your Unity projects and versions in one place.
Unity Hub makes it easy to install the Unity Editor, organise projects, and access learning resources without hassle (The Project Unity).
Simply visit the official Unity website, choose your operating system, and follow the on-screen setup instructions.
Once installed, you can sign in with your Unity ID and create your first project in minutes.
With Unity Hub ready, you’re one step closer to turning your creative ideas into interactive worlds!
Install the Unity Editor
Once Unity Hub is set up, the next step is to install the Unity Editor, the leading software that creates all your games.
The Unity Editor lets you design scenes, build environments, write code, and test your games in real time (The Project Unity).
To install it, open Unity Hub, go to the Installs tab, and click Add Editor.
Choose the latest LTS (Long-Term Support) version for better stability, and include modules for platforms like Android or WebGL if needed.
After installation, you can start building your first 2D or 3D project.
With the Unity Editor installed, your imagination is the only limit to what you can create!
Create a New Unity Project
Now that your setup is complete, creating a new Unity project is the exciting first step toward building your dream game.
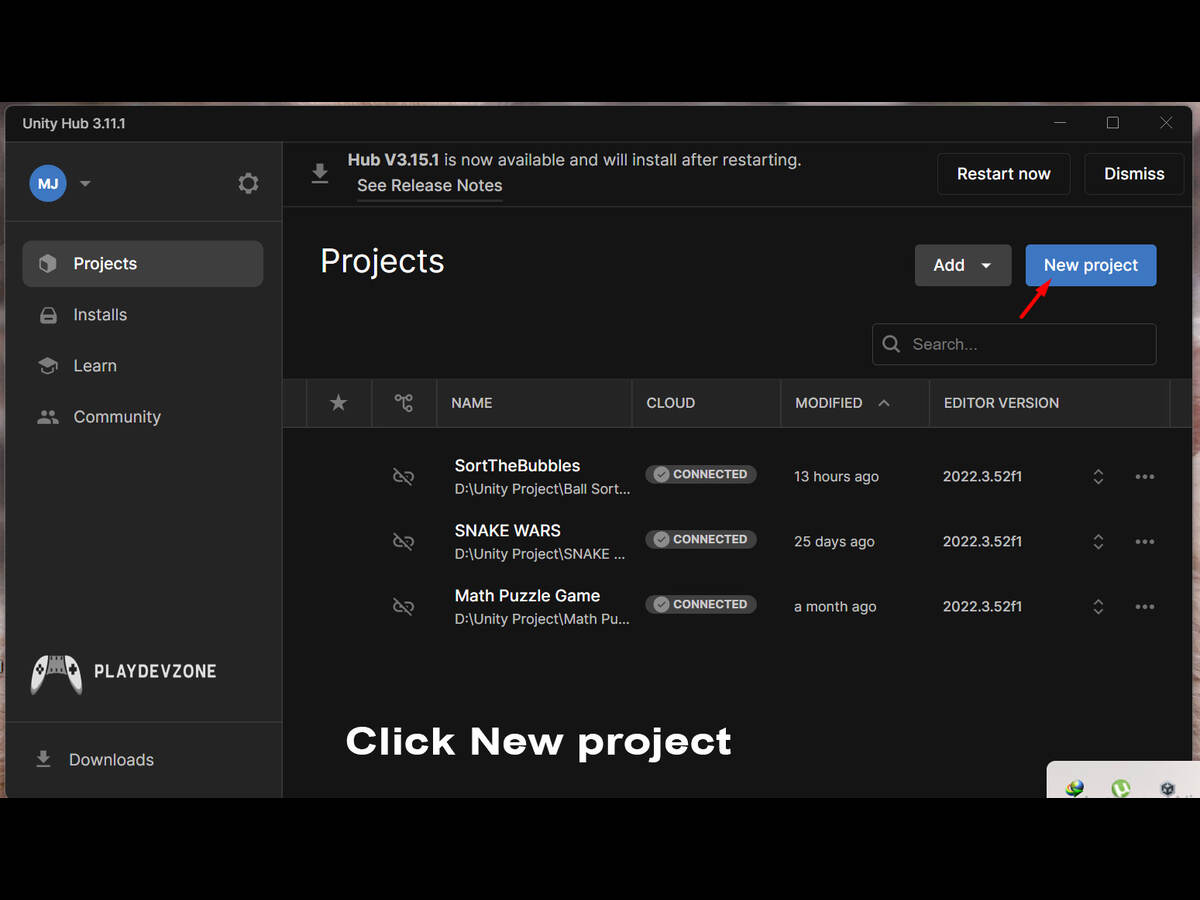
Open Unity Hub, click “New Project,” and select a template such as 2D, 3D, or URP (Universal Render Pipeline) based on your goals (The Project Unity).

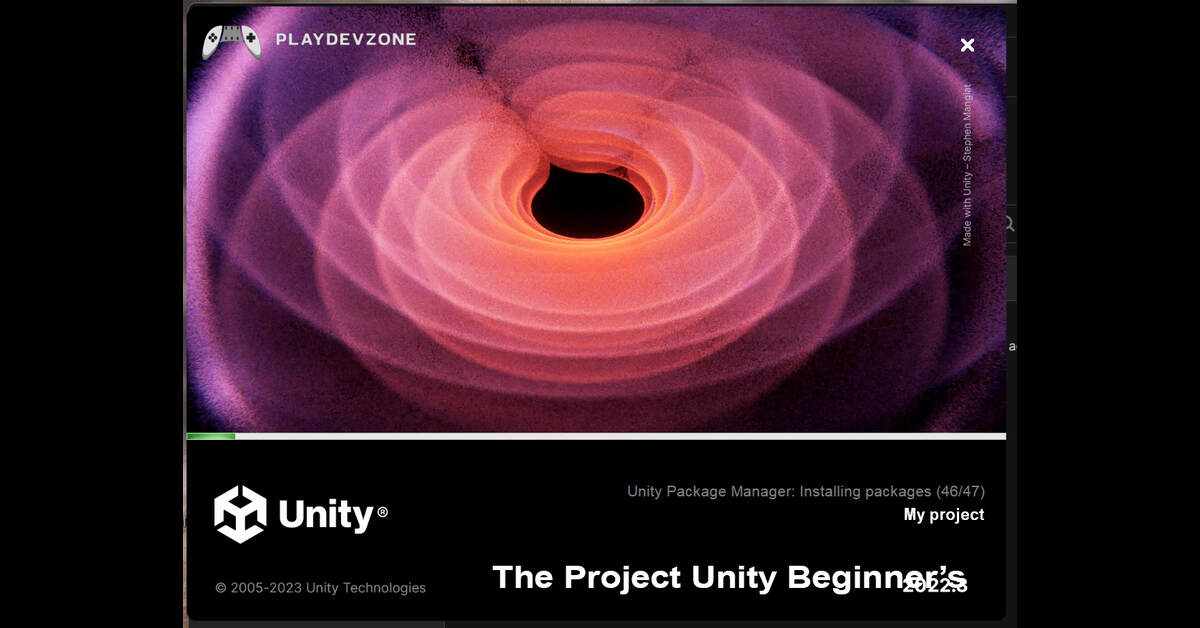
Give your project a meaningful name and choose a save location. Once you click Create, Unity will automatically open your workspace, where creativity begins.
This is where you’ll design scenes, add assets, and bring ideas to life.
Starting your first Unity project is more than just a setup; it begins your journey as a game developer!
Exploring the Unity Interface
Once your project is open, it’s time to explore the Unity interface, the creative hub where all your game magic happens.
The Unity interface is made up of essential panels like the Scene View (to design your world), Game View (to see it as the player would), Hierarchy (to organize objects), Inspector (to adjust settings), and Project Panel (to manage assets).
At first glance, it might seem overwhelming, but once you understand how these panels work together, you’ll be designing scenes effortlessly (The Project Unity).
Take time to explore, experiment, and make the interface your own. Mastering it is the key to becoming confident with Unity and turning imagination into gameplay!
Setting Up Your First Scene
Once your project is open, it’s time to explore the Unity interface, the creative hub where all your game magic happens.
The Unity interface is made up of essential panels like the Scene View (to design your world), Game View (to see it as the player would), Hierarchy (to organise objects), Inspector (to adjust settings), and Project Panel (to manage assets).
At first glance, it might seem overwhelming, but once you understand how these panels work together, you’ll be designing scenes effortlessly (The Project Unity).
Take time to explore, experiment, and make the interface your own. Mastering it is the key to becoming confident with Unity and turning imagination into gameplay!
Save and Organize Your Project Properly
As you build your first game in Unity, saving and organizing your project is crucial.
Start by regularly saving your scenes and the overall project to avoid losing progress. Create a clear folder structure within your Project Panel, separating assets into folders like Scenes, Scripts, Prefabs, Materials, and Audio.
Consistent organization keeps your workflow efficient and prepares you for larger, more complex projects in the future (The Project Unity).
Naming objects and files clearly ensures you and anyone collaborating with you can navigate the project efficiently.
By mastering the habit of proper saving and organization, you set yourself up for smooth development and a professional approach to game creation.
Next Steps After Setup
Congratulations! With Unity installed, your first project is created, and your initial scene is set up. It’s time to plan your next steps after setup (The Project Unity).
Start by exploring basic C# scripting to bring objects to life, add movement, and interact with your scene.
Experiment with lighting, materials, and physics to make your environment more realistic.
You can dive into Unity’s Asset Store to enhance your project with free or paid assets.
Don’t forget to explore tutorials on Unity Learn and YouTube to strengthen your skills. Every small experiment builds your confidence and mastery (The Project Unity).
By taking these next steps, you transform your setup into a living, playable game and move closer to becoming a skilled game developer.
Common Beginner Mistakes to Avoid
Starting with Unity can be exciting, but avoiding common beginner mistakes will save you time and frustration.
One frequent error is neglecting to organize assets and scenes, which can lead to a messy, hard-to-manage project (The Project Unity).
Another is overcomplicating your first project with advanced features before mastering the basics.
Skipping regular saves and backups is risky, as unexpected crashes can erase work hours.
Finally, many beginners avoid exploring tutorials, community forums, or the Unity Learn platform, missing valuable guidance.
By being aware of these pitfalls and adopting structured habits from the start, you’ll enjoy a smoother learning curve, stay motivated, and build a solid foundation for creating amazing games.
FAQ (Frequently Asked Questions)
Can a 12 year old use Unity?
Absolutely! Unity is beginner-friendly and can be used by a 12-year-old with curiosity and guidance.
While some aspects involve coding in C#, Unity’s visual interface, drag-and-drop tools, and extensive tutorials make it accessible to young learners (The Project Unity).
Starting with small 2D projects or pre-made assets allows beginners to understand the basics without feeling overwhelmed.
Additionally, Unity provides learning resources, community support, and kid-friendly tutorials, making it safe and educational.
With patience and creativity, a 12-year-old can design games, interactive stories, or simulations, building skills that can grow into a future in game development.
How to launch a Unity project?
Launching a Unity project is easier than you think! Start by opening Unity Hub and selecting your project.
Make sure all your assets are organized and your scenes are saved. Next, configure your Build Settings: choose the target platform (PC, mobile, or web), adjust resolution, and enable any necessary player settings.
Once ready, click Build and Run. Unity will compile your project and launch it on your chosen platform. Remember, testing frequently and optimizing performance ensures a smooth experience for your users.
Mastering these steps empowers you to bring your creative vision to life confidently.
Do any AAA games use Unity?
The engine Unity can power AAA‑level games, though it’s more common in indie or mid‑tier titles.
For example, Hearthstone, developed by Blizzard Entertainment, was built with Unity and became a massive, multiplatform success (The Project Unity).
Unity’s cross‑platform strength, rapid iteration tools, and modular workflow make it a viable engine for big‑budget projects.
So if you’re wondering whether Unity is “good enough for AAA games”, yes, it absolutely is.
How to start working on Unity?
Starting with Unity is exciting and beginner-friendly! First, download Unity Hub and install the latest stable version of Unity.
Create a new project and choose a template that fits your goal: 2D, 3D, or URP.
Familiarize yourself with the Editor interface, including the Scene, Game, and Inspector windows.
Experiment with simple objects, add components, and test fundamental interactions (The Project Unity).
Unity’s Asset Store offers free models, textures, and scripts to accelerate learning. Finally, explore tutorials and official documentation to strengthen your skills.
By taking small, consistent steps, you’ll quickly turn ideas into interactive experiences, unlocking your potential as a game creator.
Is Unity best for beginners?
Absolutely, Unity is an excellent choice for beginners in game development. It offers a user‑friendly interface with drag‑and‑drop tools and visual editors that let you build scenes quickly.
Unity also uses C#, a relatively accessible programming language compared to C++, shortening the learning curve (The Project Unity).
With a massive community, extensive tutorials, and a rich Asset Store packed with ready‑to‑use assets, beginners can start creating games fast without getting lost.
So if you’re starting, Unity gives you the tools to finish your first game and build confidence.
Conclusion
In conclusion, learning how to start the Unity project doesn’t have to be overwhelming.
With this Beginner’s Complete Setup Guide, you have a clear roadmap from installing Unity Hub to exploring the Editor and creating your first scene.
Following these steps, you can confidently turn your ideas into interactive games, experiment with assets, and gradually master more advanced features.
Unity’s intuitive interface, vast resources, and supportive community make it the perfect starting point for aspiring game developers.
Leap today, and let your creativity come to life. Your first Unity project is just a few clicks away!

